How to connect the micro:bit to a computer and then upload a code file to the micro:bit?
Connection to the computer
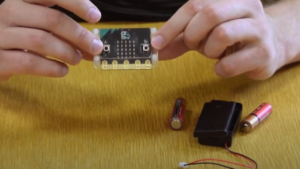
Before watching the video below, which guides you through uploading your code file to the micro:bit, we invite you to watch our video, which explains how to connect the micro:bit to your computer using a USB cable.
The cable plugs into your computer’s USB port, and the computer plugs into the micro:bit. Once plugged in, we can immediately see what we’re going to do on screen.
Downloading the code file
Next, we’ll take you through Kyle’s step-by-step instructions for uploading your code to the micro:bit. There are several possible methods for uploading your code file to your micro:bit, but the simplest is as follows.
Method 1
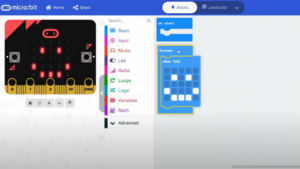
Once you’ve connected the micro:bit to your computer, you can then click on the three little dots next to the “Download” button on the screen and select “Pair device”.
When this is done, you’ll see a window appear on your screen, which may be different depending on the browser you’re using. The same window should appear if you’re using Microsoft Edge or Google Chrome. Keep clicking on pair device in the new window until a white pop-up window appears.
In this new window, click on “BBC micro:bit CMSIS-DAP“, then confirm by clicking on “Connect“. Then go back to the three dots and select “Download to micro:bit“.
That’s all you need to do using method 1.
Uploading is very important, because every time you make a change to your code, you’ll have to upload it to the micro:bit again.
Method 2
The second method is a little more complex, but may suit you better depending on your browser.
First, open the document holder and slide to the left until you find “MICRO:BIT“. A window should open automatically when you connect the micro:bit to your computer, but if this doesn’t happen you can simply click on your computer’s briefcase and find the micro:bit file there.
Once you’ve opened it you go back to MakeCode and click on “Download” or “Save”, which is the little blue icon with a floppy disk to the right of the download button.
What these two options do is download the code, which should appear at the bottom of your screen in the download bar. Then you use the click-and-drag method by holding down the button on the file that appears at the bottom and dragging it onto the briefcase icon and when your micro:bit file appears you can drag it onto this window and then release it in the briefcase.
Don’t worry if the file icon starts flashing and disappears from the file you’ve just put it in, it means it’s worked.
However, sometimes the file does not appear at the bottom of the screen. Simply go back to your briefcase and find your download file. The file you’ve just downloaded should be there, and as before, you’ll use the click-and-drag method to drag it to your micro:bit file.
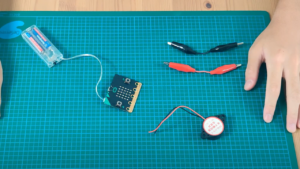
The next step is to connect the micro:bit to the piezoelectric speaker!
- 9 February, 2024
Subscribe to the newsletter
Keep up to date with the
techno-educational news!

Would you like to find out more?
Book a call with our team!
We’ll help you discover our products and installations, and set them up in your classroom.
Explore our complete offer !
Discover all our educational and techno-creative kits, as well as our workshop and training offers, in our online store.